Operation of MD analyzer for Moment Disconnection Testing (for NMS10)
Text and images from this video
Setting
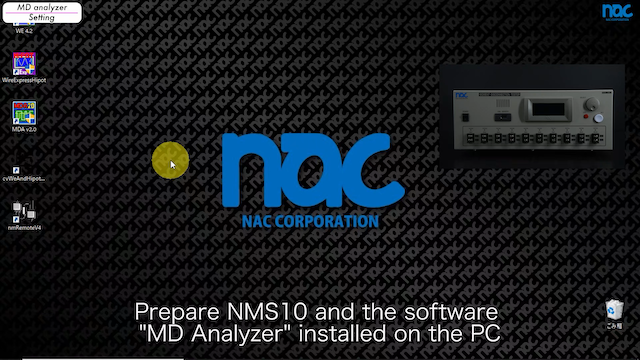
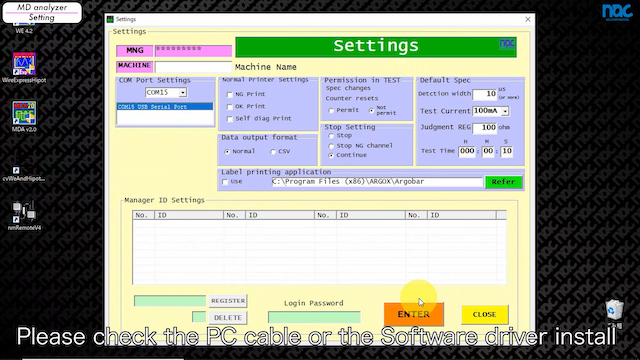
Prepare Harness NMS10 and "MD analyzer" installed on the PC. Turn on the tester and connect to the PC with PC cable. Start the software. Non-connection is displayed. You need to set the com port. Input default Manager ID ,nacman790. Please open the Setting. Set COM port. If the tester is connected to PC, the COM Port will be displayed. If it is not displayed, the tester is not connected properly. Please check the PC cable or the Software driver install. After setting the COM, Please go back to MENU. The tester name will be displayed in a few seconds. Then the connection is completed. There are two types of login. Checker, and Manager. The checker can operate only parts for testing. The Manager can operate all functions of this software including creating test data and management of test reports. If you log in, the buttons will be active depending on the login type. Let's check the Setting again. In setting, you can set the default test specification, test setting and ID registration.
Data Management
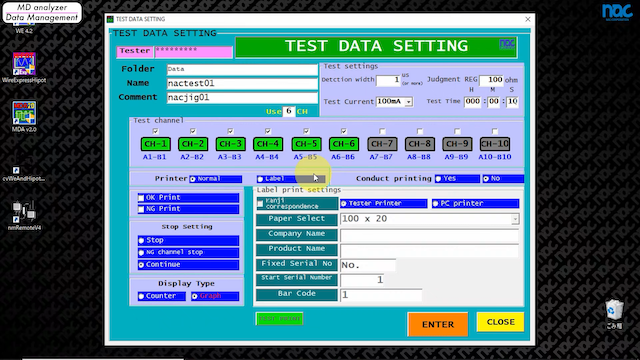
Let's create test data. Please open Data Management. Click "create new data". Input the product name and comment. The comment is available for the test instructions. Please set the test channels, test specs, and settings. The inspection time can be set to 999 hours, 59 minutes, and 59 seconds. You can set the stop setting. This is used to set the test stop setting when momentary disconnections occur. The default setting is Continue. The momentary disconnection detection width can be set from 0.1 microseconds to 99.9 microseconds. If a momentary disconnection occurs, the tester continues to test for the specified time. If you finish them, Please press ENTER to complete creating test data. Of course, you can re-edit the data.
Test
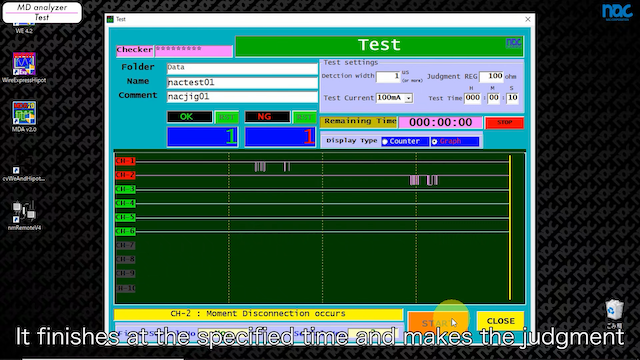
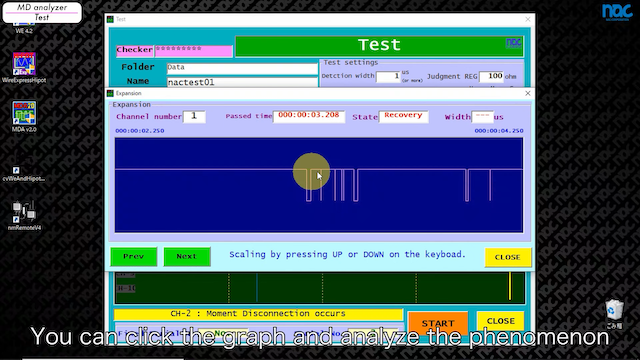
You can test with the test data. Please select the test data. This is the test screen. If you click start, the test will run. The continuity of each channel is displayed. The test was completed and passed. If no disconnection occurs, it will show "PASS". Let’s check the case of the momentary disconnections detected. The momentary disconnections are shown in the graph like this. All channels are always monitored at the same time. It finishes at the specified time and makes the judgment. You can click the graph and analyze the phenomenon.
Test Report
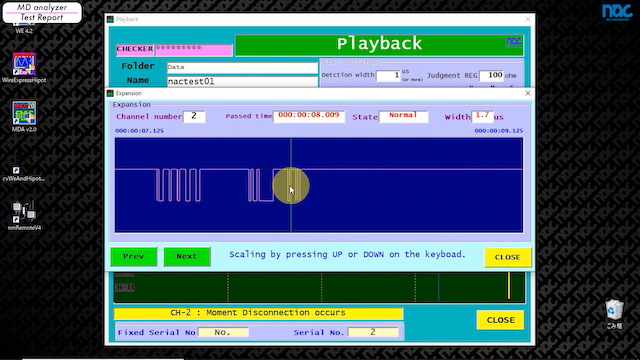
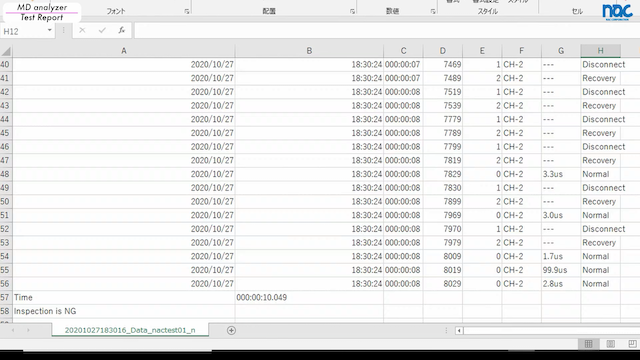
All test reports are saved by each test. And you can play back the test as the graph to analyze the events. Please decide the condition and click enter. Select the test report and click DETAIL. Select the line and click the test data. The test report will be written out. Open the test report. It contains information about the date and time, the test spec, the measured value, and the result. For the daily check,please conduct it.
Self-Diagnosis
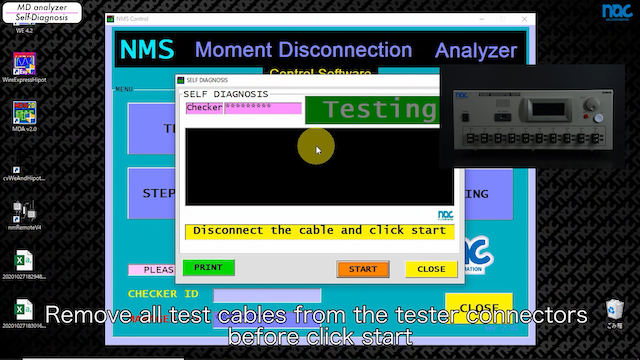
Self-diagnosis is the function to check the tester before testing. For the daily check, please conduct it. Remove all test cables from the tester connectors before click start. It shows "pass".The tester is normal. If NG occurs, please check your environments. Please contact us in case of tester failure.
- Product Search
- Inspection Spec
- Category
- Options
- Discontinued Product
- All Products


